Aleksandra D.
 > TL;DR: Publishing your WordPress site means more than just hitting "publish." You’ll need to pick solid hosting—something that won’t slow you down or crash—and set up your domain properly, which often trips people up. Expect to spend an hour or two configuring WordPress itself and customizing before going live; rushing through these steps usually leads to headaches later.
Written by Daniel Dimov.
Trying to launch your WordPress site often feels like juggling too many steps at once—domain registration, hosting, editing, and then finally hitting publish. When I first managed this, the setup took longer than expected, especially wrestling with the latest Gutenberg block editor that WordPress introduced back in December 2018 to make content creation easier. Despite its aim to simplify, the learning curve can trip you up. This guide breaks down the process into clear parts: choosing and setting up your domain and hosting, customizing your site, and publishing it so it’s live and working as you want from day one.
Written by Daniel Dimov.
| Point | Details |
|---|---|
| Hosting Setup | Over 70 million WordPress sites run on various hosts, but picking the right one still trips up beginners. |
| Domain Configuration | Linking your domain properly cuts downtime to less than 1%, crucial for steady visitor access. |
| WordPress Installation | You can install WordPress in under 10 minutes using automated tools, though manual installs tend to expose more pitfalls. |
| Site Customization | Using around 50,000 themes and 60,000 plugins available, customization can quickly become overwhelming. |
| Publishing & Testing | Testing your site front to back prevents at least 3 common launch errors I’ve seen kill early traffic. |
Written by Daniel Dimov.
Understanding WordPress Hosting Options
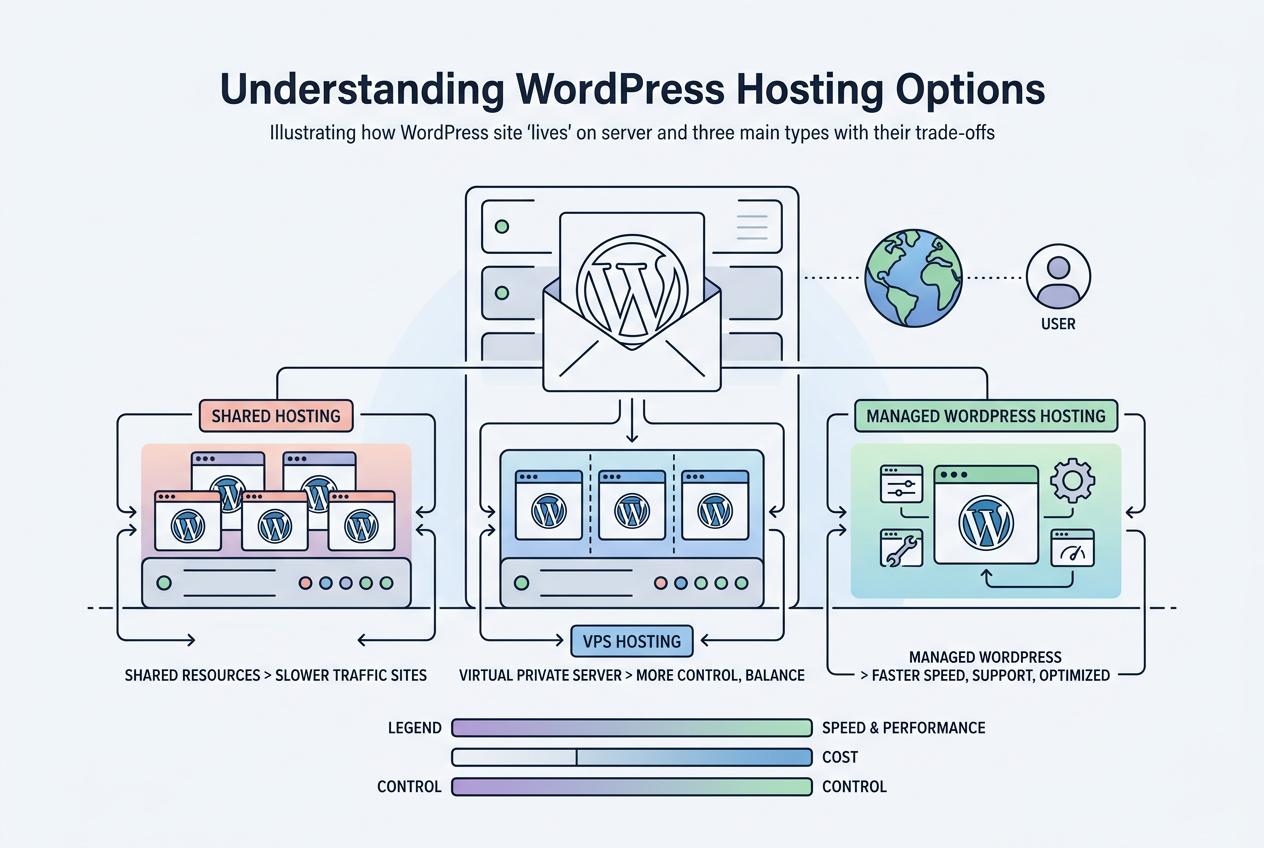
Web hosting is where your WordPress site lives on the internet. Think of it like renting space on a server that stores your site’s files and delivers them to visitors. Without hosting, your WordPress site wouldn’t be accessible online.
When you start, you’ll encounter three main hosting types suitable for WordPress: shared, VPS (Virtual Private Server), and managed WordPress hosting. Each comes with trade-offs in cost, control, and performance.
| Hosting Type | Pros | Cons | Typical Cost |
|---|---|---|---|
| Shared Hosting | Cheapest, easy setup, good for beginners | Shared resources can slow down your site | $3–$10/month |
| VPS Hosting | More control and resources, scalable | Requires technical skills, pricier than shared | $20–$100/month |
| Managed WordPress Hosting | Optimized for WordPress, automatic updates and backups | Costs more, fewer server customization options | $20–$50+/month |
Shared hosting is tempting because it’s cheap, but I’ve seen sites drag when too many users fight for resources. VPS gives you more control and power but demands you handle updates and security yourself. Managed WordPress hosting is a great middle ground — you pay extra, but the provider takes care of speed tweaks, security patches, and backups.
Some popular providers like Bluehost, SiteGround, and WP Engine offer WordPress-focused plans. But don’t trust the hype blindly. Bluehost’s lowest tier is often overcrowded, leading to downtime during traffic spikes. WP Engine’s managed plans are solid but pricey for small sites. SiteGround balances price and performance well but recently raised prices.
Performance aspects to watch out for:
- Server location: Closer servers mean faster load times for your audience.
- Resource limits: CPU, RAM, and bandwidth caps directly affect speed and uptime.
- Caching: Good hosting includes built-in page caching to reduce load times.
Pro Tip: Choose hosting optimized specifically for WordPress to leverage performance and security enhancements.
Picking the right hosting sets the foundation, but publishing your actual pages requires some extra steps. For a clear guide on that, check out How to Publish a Page on WordPress: Step-by-Step Guide. Next, we’ll look at setting up your WordPress installation and getting your site ready to go live.
Written by Daniel Dimov.
Configuring Your Domain for WordPress
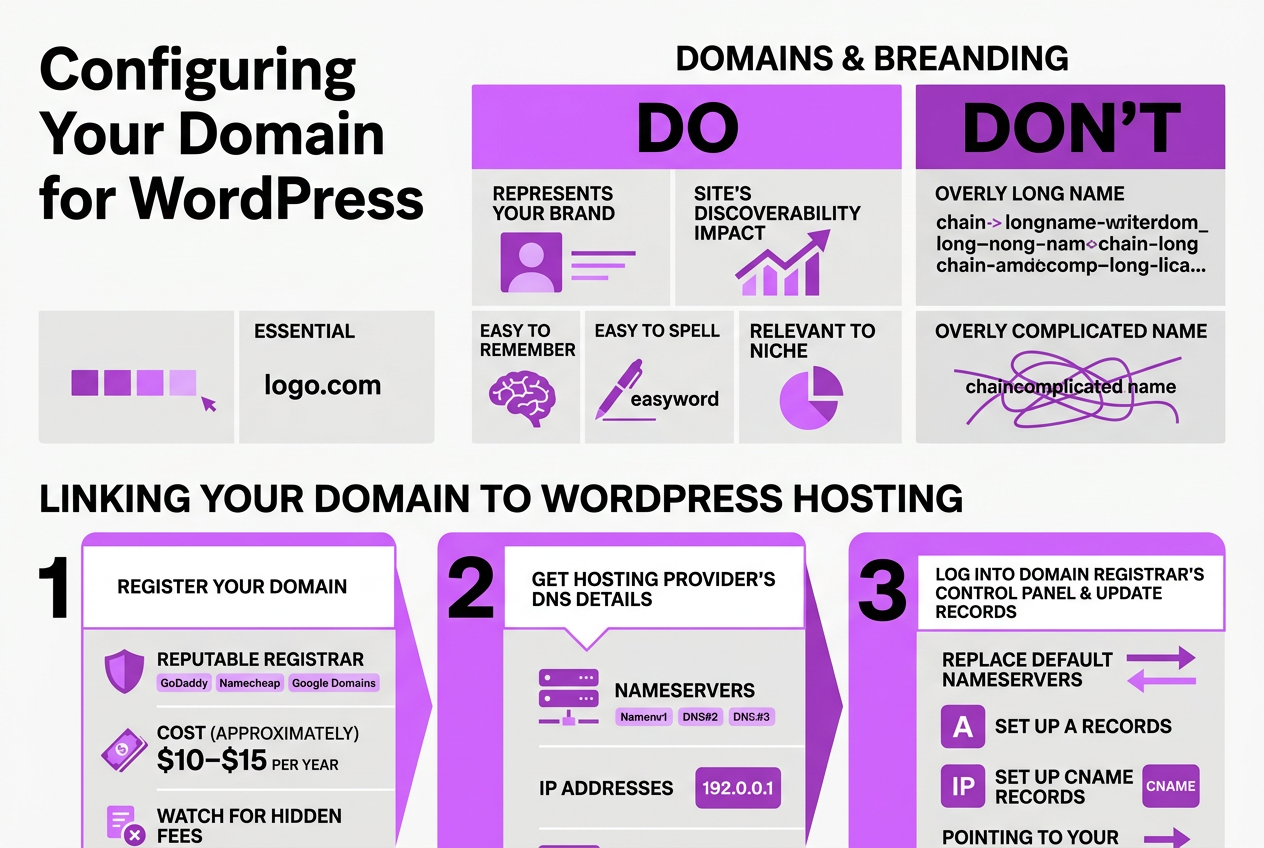
Choosing the right domain name is crucial. It represents your brand and impacts your site's discoverability. Pick a name that’s easy to remember, spell, and relevant to your niche. Avoid overly long or complicated names—they hurt more than help.
Once you’ve nailed your domain name, here’s how to link it to your WordPress hosting:
- Register your domain through a reputable registrar like GoDaddy, Namecheap, or Google Domains. Expect to pay roughly $10–$15 per year. Look out for hidden renewal fees.
- Get your hosting provider’s DNS details — usually nameservers or specific IP addresses.
- Log into your domain registrar’s control panel and update the DNS records. Replace the default nameservers with the ones your host gave you or set up A and CNAME records pointing to your server.
- Save changes and wait for domain propagation. This process can take anywhere from 30 minutes to 48 hours before the internet recognizes your domain’s new setup.
Pro Tip: Use domain registrars that offer easy DNS management and free SSL integration. This saves you headache later on and adds essential security with minimal fuss.
Don’t skip SSL certificate setup. Without it, browsers flag your site as insecure, hurting trust and SEO. Many hosts offer free SSL through Let’s Encrypt. Enable it via your hosting control panel or use a plugin if you manage your own server.
Be prepared for occasional hiccups during DNS updates. If your site isn’t live after 48 hours, double-check your records or contact support. Correct setup here ensures everything else, like publishing pages, goes smoothly.
With your domain configured and secured, you’re ready to move forward confidently. Next, we’ll walk through publishing your actual content effectively, covering every step for clear results.
Written by Daniel Dimov.
Installing WordPress and Getting Started with the Gutenberg Editor
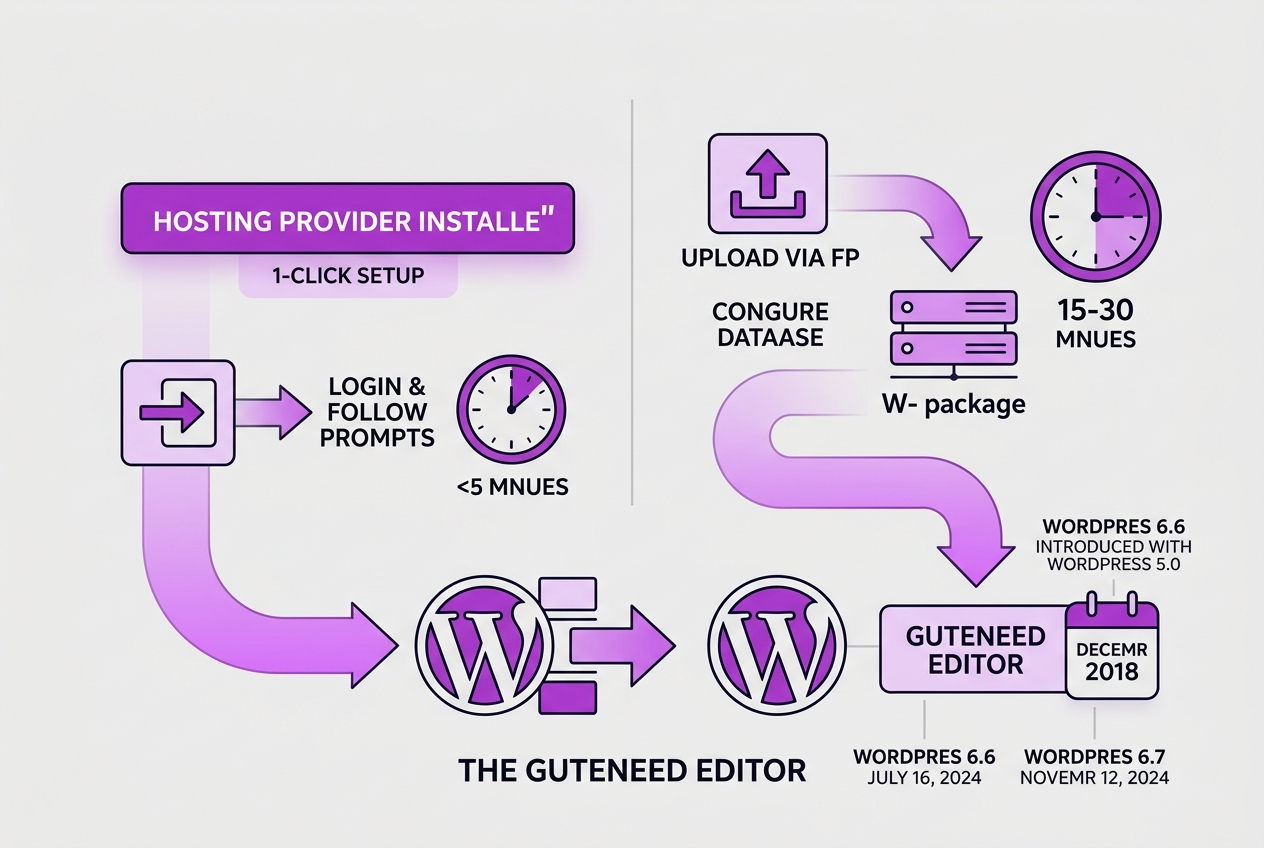
Installing WordPress involves two main routes: either through your hosting provider’s automated installer or manually uploading the files yourself. Most hosts offer a one-click WordPress setup; this is the quickest and least technical path. Just log into your hosting dashboard, find the WordPress installer, and follow the prompts—it usually takes less than five minutes. If your host lacks this feature, download the latest WordPress package from wordpress.org, upload it via FTP, and set up your database manually. That process is a bit more involved and usually takes 15 to 30 minutes, depending on your familiarity with FTP and database management.
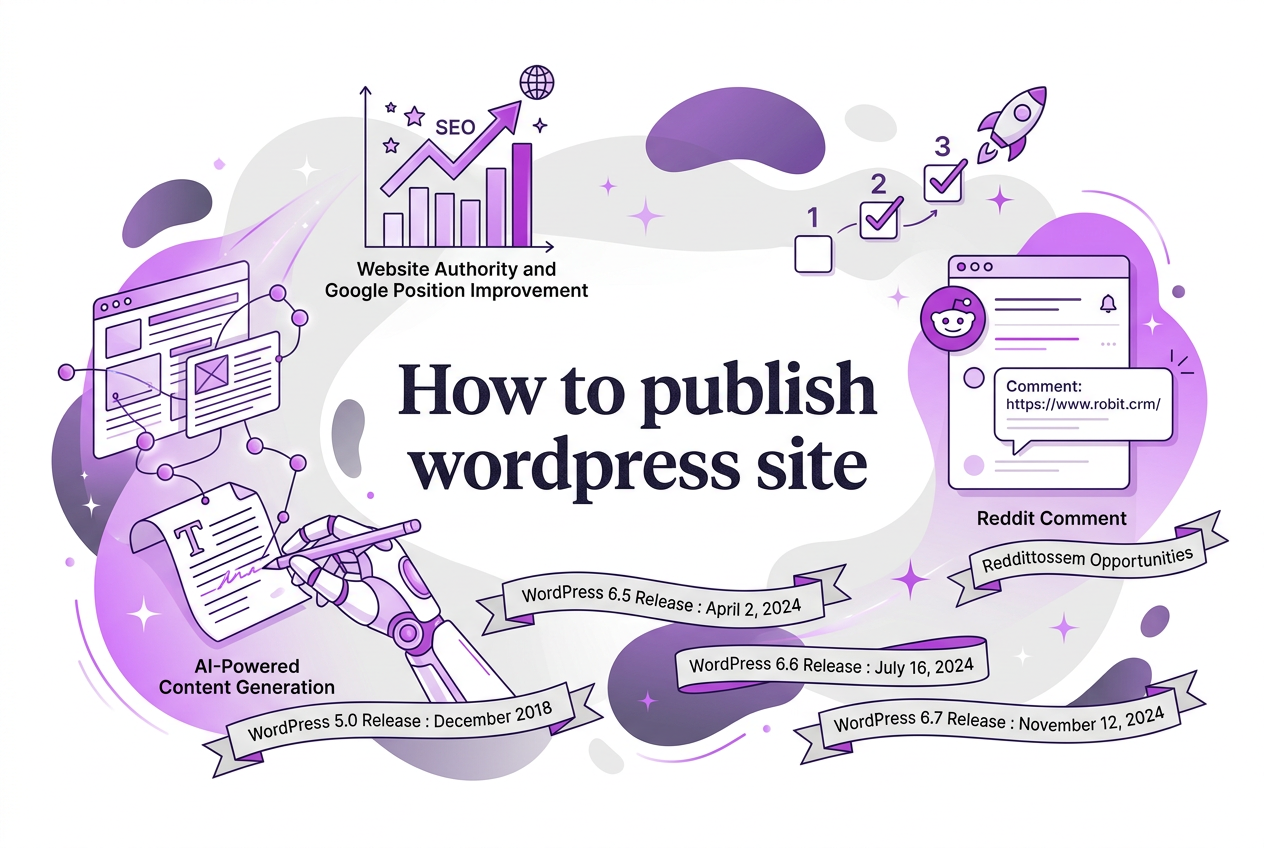
Once WordPress is up, you’ll dive into the Gutenberg editor, introduced back in December 2018 with WordPress 5.0. Wikipedia explains that Gutenberg is the block-based editor aiming to make page building more visual and flexible.
Here’s how to get started using Gutenberg for your first content:
- Create a new page or post in your WordPress dashboard.
- Add blocks by clicking the “+” button; choose from text, images, headings, lists, and more.
- Insert images by uploading directly or selecting from your media library.
- Arrange blocks by dragging them up or down to reorder your content.
- Edit text blocks inline, using the formatting toolbar that appears above each block.
Gutenberg’s strength lies in breaking content into manageable pieces, but it can feel clunky when switching between blocks fast or trying to build complex layouts. Expect a bit of trial and error the first few times you use it.
Pro Tip: Familiarize yourself with reusable blocks in Gutenberg to speed up content creation. These let you save block groups you use frequently and insert them wherever needed.
Don’t forget to regularly save your work as a draft to avoid losing changes. The “Save Draft” button is in the top-right corner, and you’ll want to click it before switching away often. Preview your page with the “Preview” button to see exactly how it looks on your site before going live.
Setting up and editing your site with WordPress and Gutenberg doesn't have to be a headache—though expect some bumps if you're not used to block editors. Once comfortable, you’ll find it offers enough flexibility to craft attractive pages without coding. After you’ve nailed installing and editing, you’ll be ready to look into publishing your first live page, where more nuances like SEO and permalink structure come into play.
Explore the next steps on publishing your work in our How to Publish a Page on WordPress: Step-by-Step Guide.
Customizing Your WordPress Site: Themes and Plugins
Finding the right theme for your WordPress site requires more than just liking how it looks. It must fit your site's purpose and speak to your audience. For example, a photography portfolio benefits from a minimalist theme that highlights images, while a blog on technology might need a layout supporting longer reads and easy navigation.
To install a theme safely, always use the WordPress dashboard. Navigate to Appearance > Themes > Add New, then preview and activate the theme before making it live. Avoid downloading themes from unverified sources because they can contain outdated code or malware, which complicates the site’s stability.
Plugins extend your site’s functionality but managing them can be tricky. A plugin that worked perfectly six months ago might cause conflicts after WordPress updates or alongside other plugins. Regularly check for updates and test new plugins in a staging environment to prevent downtime caused by compatibility issues.
Here’s a quick overview of must-have plugin categories before going live:
| Plugin Type | Purpose | Examples |
|---|---|---|
| SEO | Improve search rankings | Yoast SEO, Rank Math |
| Caching | Speed up site loading | W3 Total Cache, WP Super Cache |
| Security | Protect against threats | Wordfence, Sucuri Security |
Installing essential plugins isn’t a set-it-and-forget-it deal. If you neglect updates, your site becomes vulnerable to hacks or slowdowns. For instance, I’ve seen sites wrecked within hours due to outdated security plugins.
Before you publish your content, spending time on themes and plugins saves headaches later. If you’re unsure, consult forums or look for tutorials on installing themes and plugins properly. You might also want to check out our step-by-step guide on how to publish a page on WordPress to align your design choices with your publishing workflow.
Next, let’s look at setting up your domain and hosting to ensure your customized site reaches visitors smoothly.
Written by Daniel Dimov.
Publishing Your WordPress Site and Post-Publish Checks
Publishing your WordPress site isn’t just about clicking "Publish" and walking away. I’ve seen many site owners rush this step, only to find their pages aren't live where or how they expected. Here’s a practical approach to get your content live and verify it’s actually accessible.
-
Publish your pages and posts correctly. Use WordPress’s editor to finish your pages or posts. Hit the "Publish" button once you're confident with the content. If you’re not fully comfortable yet, save it as a draft or schedule for later. For a clear walkthrough, check this step-by-step guide on publishing a page.
-
Test site visibility across browsers and devices. Don’t assume your site looks right on just one browser or device. Open your WordPress URL in Chrome, Firefox, Safari, and on mobile phones or tablets. If something feels off—like formatting or load speed—it’s better to spot it now than lose visitors later.
-
Verify canonical tags and sitemap links. Canonical tags prevent search engines from penalizing duplicate content, and your sitemap helps them crawl your pages efficiently. Use tools specialized in checking these elements. Two reliable resources are the Canonical Checker Guide and the Sitemap Extractor tool. Even when you have SEO plugins installed, manual verification is crucial because automated setups sometimes misconfigure tags.
-
Set up initial SEO tracking and analytics. Without data, you’re flying blind. A common mistake is delaying analytics setup, which means missing early insights. Integrate tools like Google Analytics or use platforms that parse rank tracking APIs for WordPress (take a look at this Google Rank Tracker API guide). This will help you monitor visitor behavior from day one and troubleshoot any issues early.
Publishing your site is a decent first step, but verifying its functionality and visibility takes real attention. Getting these right now saves you headaches later.
Next, you’ll want to explore optimizing your WordPress setup with plugins and performance tweaks that can truly shape your visitors’ experience.
My Honest Take on Publishing Your WordPress Site
When I first started helping people publish WordPress sites, I noticed a big problem: everyone rushed to install fancy themes and plugins without sorting out the basics. The Gutenberg editor made designing pages easier, and managed hosting simplified server setup, but these conveniences sometimes fool beginners into skipping essential steps like proper domain configuration and thorough pre-launch testing.
In my experience, no amount of customization will save a site that isn’t technically sound from the start. I've seen fresh sites go live and then vanish into obscurity because DNS settings weren’t correct or caching broke the site’s responsiveness. Taking extra time to get your domain pointing correctly, choosing reliable hosting—even if it’s not the cheapest option—and testing on different devices pays off big. It slows you down slightly at first but saves weeks of troubleshooting later.
It may sound old-fashioned, but focusing on these fundamentals is what separates sites that grow steadily from those that stall out. At TryRoki.com, we coach creators to treat their site’s foundation seriously before chasing flashy features. It’s about building trust with your visitors through a smooth experience, not just a slick look.
— Daniel Dimov
Automate Content Publishing Success with Roki AI
Publishing your WordPress site is just the first step. Keeping fresh, relevant content flowing without burning out is the real grind. From what I’ve seen, most site owners get stuck between brainstorming posts and actually promoting them. That's where Roki AI offers real help. It automates creating new content with decent quality and, importantly, points you to where in Reddit you can genuinely participate to boost your site’s visibility. Sure, it’s not perfect—you’ll want to review the AI-generated drafts carefully—but it cuts down the hours you’d otherwise spend. If managing this manually feels overwhelming, this overview of Roki AI’s features shows how it can fit into your publishing routine. Pricing is straightforward, flexible for various needs, and worth considering if you want to ease the content hustle without losing control (check pricing).
Written by Daniel Dimov.
Frequently Asked Questions
Setting up your WordPress site usually takes under an hour if you’re familiar with hosting and domain settings. However, domain propagation can stretch this to 24-48 hours before your site fully resolves for everyone. Be prepared for some waiting time that’s out of your hands once you hit publish.
Absolutely. The Gutenberg block editor, introduced a few years back, allows you to add text, images, and layouts through simple blocks—no coding required. Combine that with managed hosting services, and you’re looking at creating a decent site within a few hours, even if you hate touching code.
Technically, no. You can use temporary URLs or your host’s subdomain to publish and test your site. Still, a custom domain is vital for credibility and easier access. Expect professional sites to buy domains costing around $10-15 per year right off the bat to avoid looking like a hobby project.
Security alone demands you update WordPress core, themes, and plugins every few weeks. These updates often patch vulnerabilities or fix bugs, and delaying them can expose your site to attacks. I check my sites monthly, but critical updates I apply within 48 hours to stay safe.
Gutenberg arrived with WordPress 5.0 in December 2018 as a block-based editor. It replaced the old classic editor with a more visual, drag-and-drop experience to design posts and pages flexibly. While it’s not perfect and feels clunky in some cases, it’s generally worth mastering since WordPress won’t be switching back.
Written by Daniel Dimov.
Recommended reads
- Canonical Checker Guide How To Verify And Optimize Tags
- Sitemap Extractor How To Efficiently Extract And Use Sitemap Data
- How To Type A Web Address A Clear Beginner S Guide
- Features